一、镜像建立脚本需要修改
https://hub.docker.com/r/internetsystemsconsortium/bind9 是启动方法
https://github.com/isc-projects/bind9-docker 里是build方法,点击Dockerfile查看第一行是否有绿勾,如下图

绿勾代表编译通过,如果是红叉,那就等等作者,如果不能等的话,也有其它方法,我们以后再说。
看Dockerfile内容如下
FROM ubuntu:jammy
MAINTAINER BIND 9 Developers <bind9-dev@isc.org>
ENV DEBIAN_FRONTEND noninteractive
ENV LC_ALL C.UTF-8
ARG DEB_VERSION=1:9.18.12-1+ubuntu22.04.1+isc+1
# Install add-apt-repository command
RUN apt-get -qqqy update
RUN apt-get -qqqy dist-upgrade
RUN apt-get -qqqy install –no-install-recommends apt-utils software-properties-common dctrl-tools gpg-agent
# Add the BIND 9 APT Repository
RUN add-apt-repository -y ppa:isc/bind
# Install BIND 9
RUN apt-get -qqqy update
RUN apt-get -qqqy dist-upgrade
RUN apt-get -qqqy install bind9=$DEB_VERSION bind9utils=$DEB_VERSION
# Now remove the pkexec that got pulled as dependency to software-properties-common
RUN apt-get –purge -y autoremove policykit-1
RUN mkdir -p /etc/bind && chown root:bind /etc/bind/ && chmod 755 /etc/bind
RUN mkdir -p /var/cache/bind && chown bind:bind /var/cache/bind && chmod 755 /var/cache/bind
RUN mkdir -p /var/lib/bind && chown bind:bind /var/lib/bind && chmod 755 /var/lib/bind
RUN mkdir -p /var/log/bind && chown bind:bind /var/log/bind && chmod 755 /var/log/bind
RUN mkdir -p /run/named && chown bind:bind /run/named && chmod 755 /run/named
VOLUME ["/etc/bind", "/var/cache/bind", "/var/lib/bind", "/var/log"]
EXPOSE 53/udp 53/tcp 953/tcp
CMD ["/usr/sbin/named", "-g", "-c", "/etc/bind/named.conf", "-u", "bind"]
我们需要将最后一行的-g参数改为-f参数,如果服务器用-f参数启动,则named.run会被stderr所代替,severity 按照服务器当前Debug级别记录日志,如果是-g则启动调试模式,输出到显示器上,所以正常工作环境下,不适用-g参数,使用nerdctl重新编译。
nerdctl build -t bind:new -f .
二、目录权限
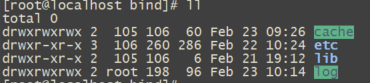
大家参考,目录内权限递归。需要注意的是配置文件及日志文件均不会自动建立,需要从容器中拷贝或新建。
三、网络
本次使用的机器包含了V4和V6地址,所以没有使用端口映射的方式启动,使用了–network host 模式,直接使用宿主机的网络地址。
原创文章,转载请注明: 转载自混沌
本文链接地址: 使用Containerd建立bind应用的几个难点